Bundt 101


Since purchasing my Nordic Ware lotus bundt pan on our recent trip to Singapore, I renewed my interest in the existing bundt pans (and some American baking books) that I own. I then purchased a few more pans which I thought would be useful for community baking. By this I mean baking large cakes for coffee mornings at church, or for sharing with my neighbours. I am always making rectangular cakes in loaf tins which are reliable but a bit plain looking, after so many years of the same style.

I also bought a dedicated bundt baking book (simply called Bundt, by Melanie Johnson), which unfortunately promised more than it delivered. I had real issues with the recipes because I found them inconsistent and most had no accompanying photos. Some of the recipes are detailed, with three separate parts e.g. cake, glaze and frosting, or cake, filling and frosting. I had to re-read them several times and then use my most creative imagination to conjure up a picture of what a completed cake might look like. Most nights I fell asleep with exhaustion at the process. So, the book is really good if you want to fall asleep, and not so good if you want to bake a bundt.

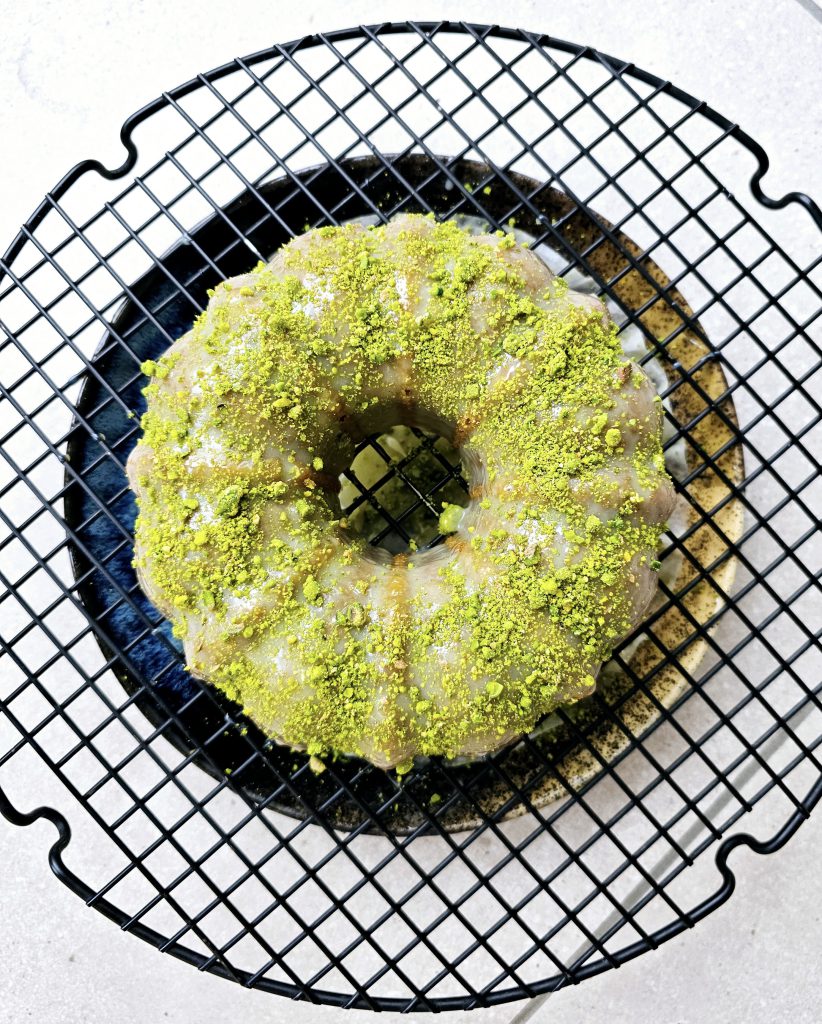
The reason for not giving up on the book is that there are some novel ideas e.g. slicing the bundt and then filling it with flavoured cream, or topping a plain bundt with frosting. Left to my own devices a bundt will always be a plain bundt as I would rely on the fancy moulding to be the glamour factor. In fact, I still think this is the best use of a bundt pan, which is to shape an ordinary cake into something more intricate looking. Sort of like a cake corset.


My own limits on creativity


I am learning how to make my cakes look more presentable


Another problem I had with the book was that the recipes varied wildly in the amount of ingredients, even when baked in similar-sized pans. All Nordic Ware pans have imprinted on them two helpful hints: the name of the pan and its volume. The volume is the amount of liquid it can hold, and not the amount of cake batter you put into it.

The varied amounts of batter used in Bundt’s recipes will yield inconsistent results using the same-size pans. Some recipes will give a taller cake which overflows the cake pan. Some recipes will make a short cake that does not reach the rim of the bundt pan, and so wasting the whole shape of the mould.


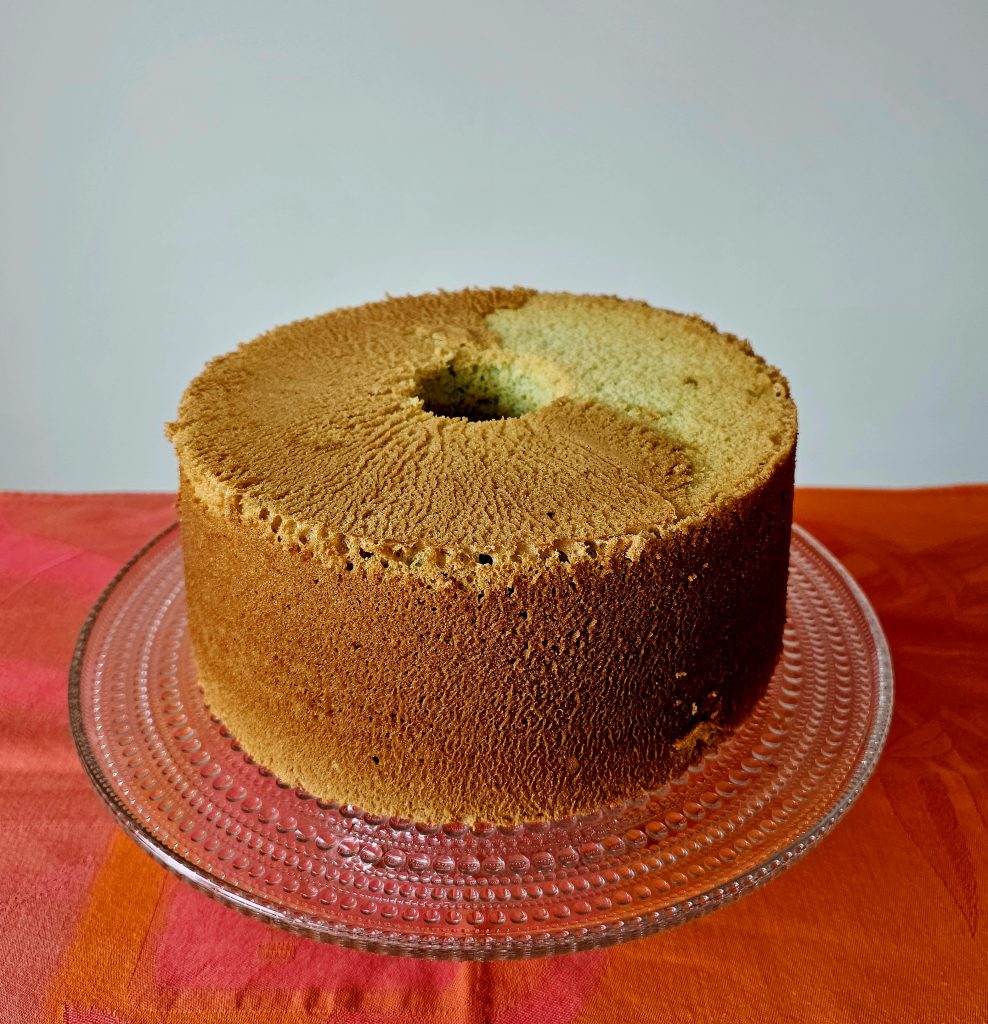
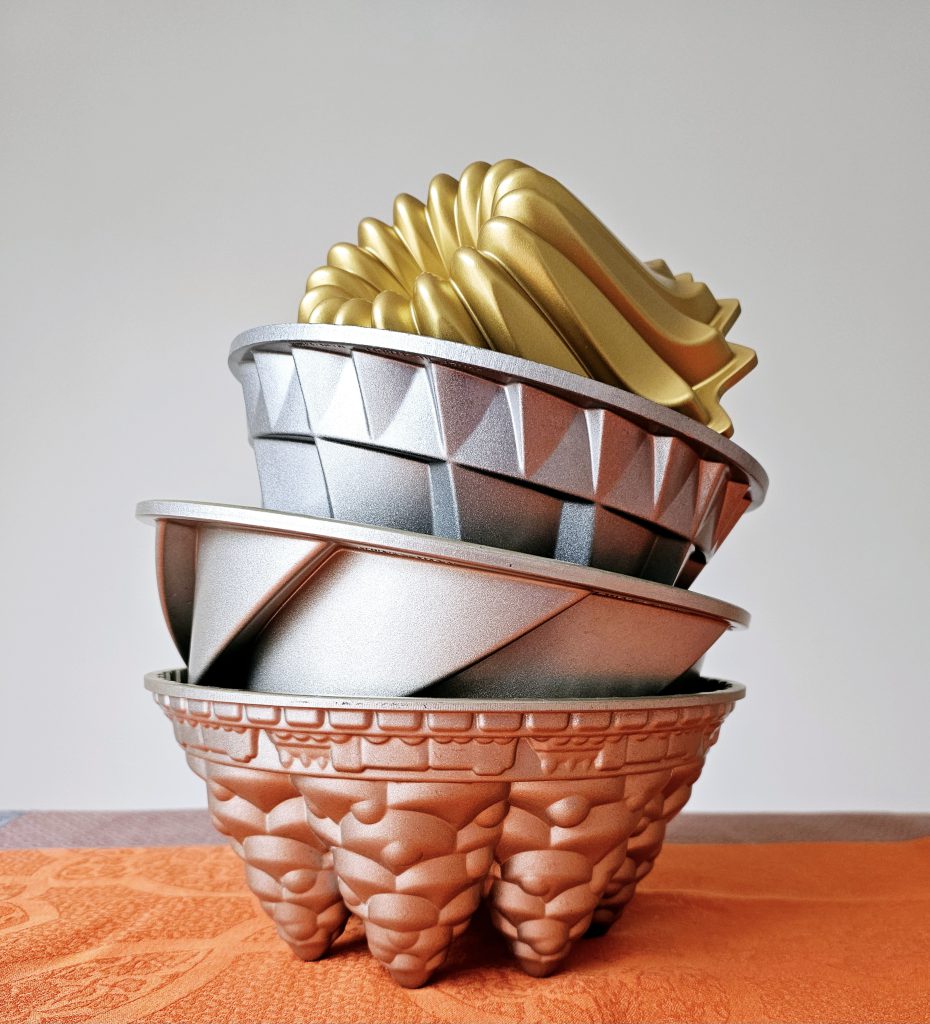
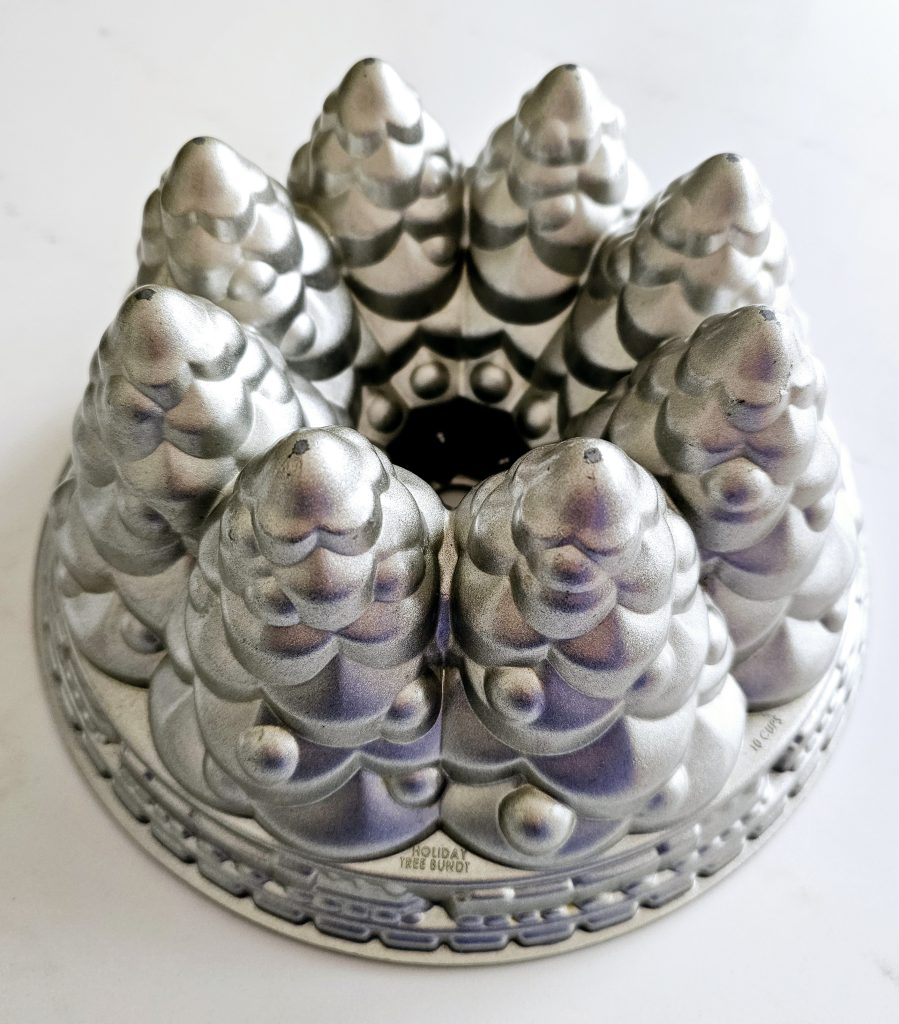
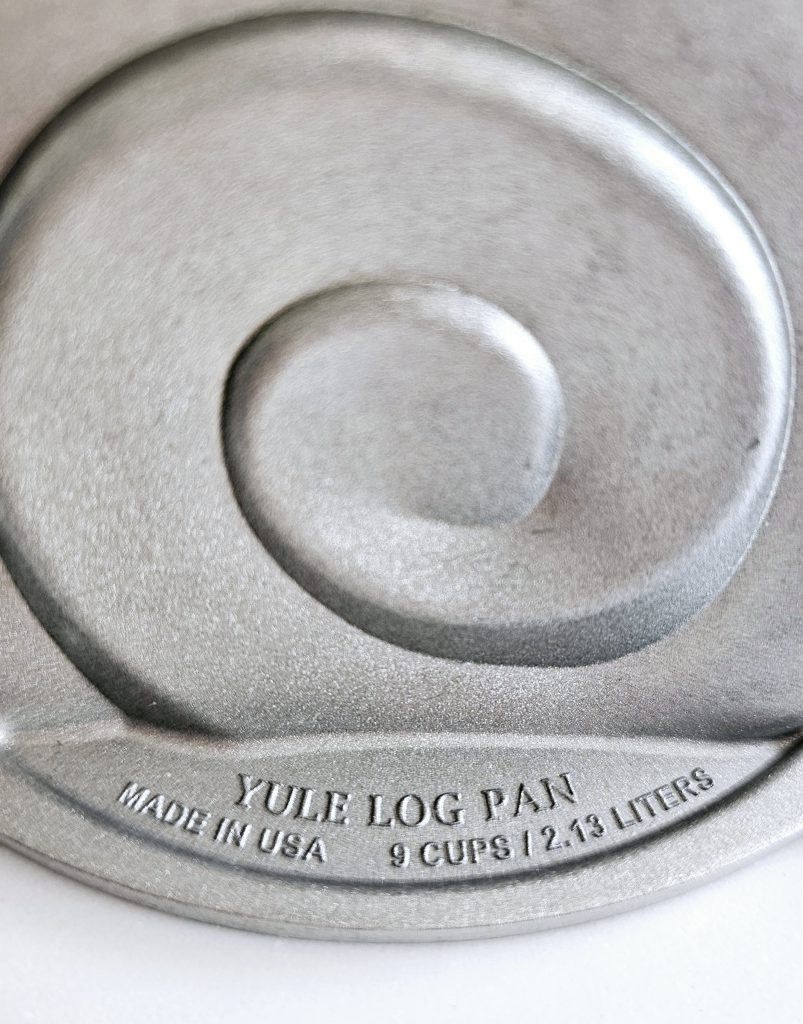
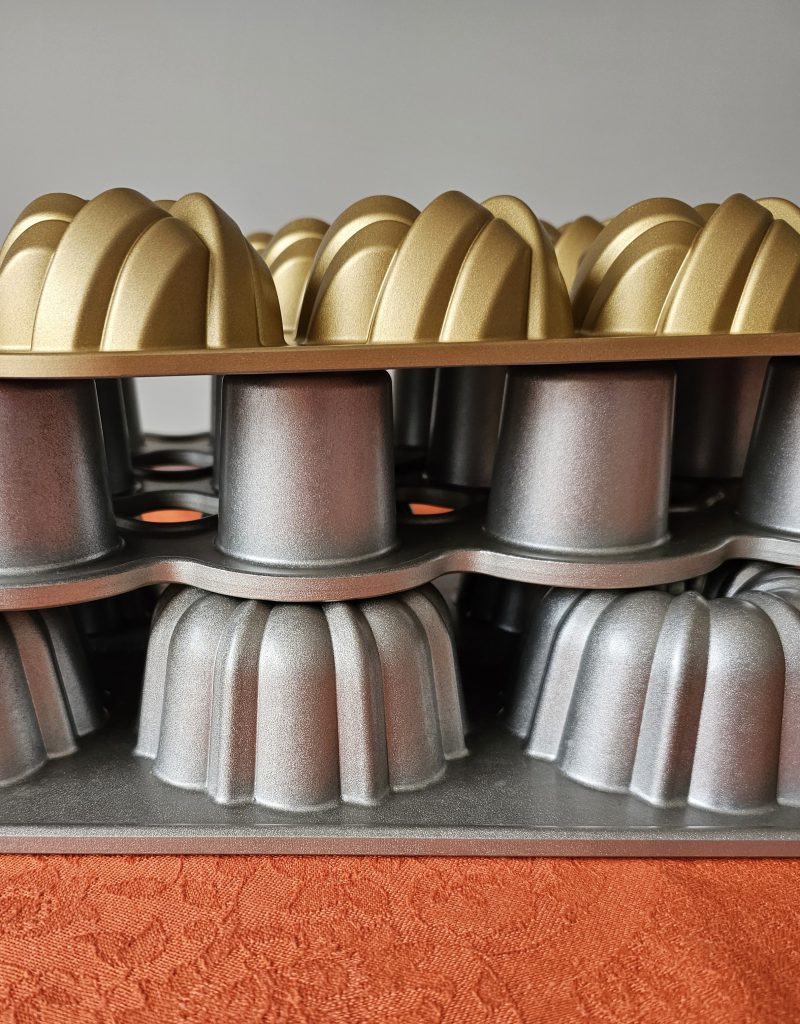
My first bundt pan, the Holiday Tree Bundt (10-cup size)


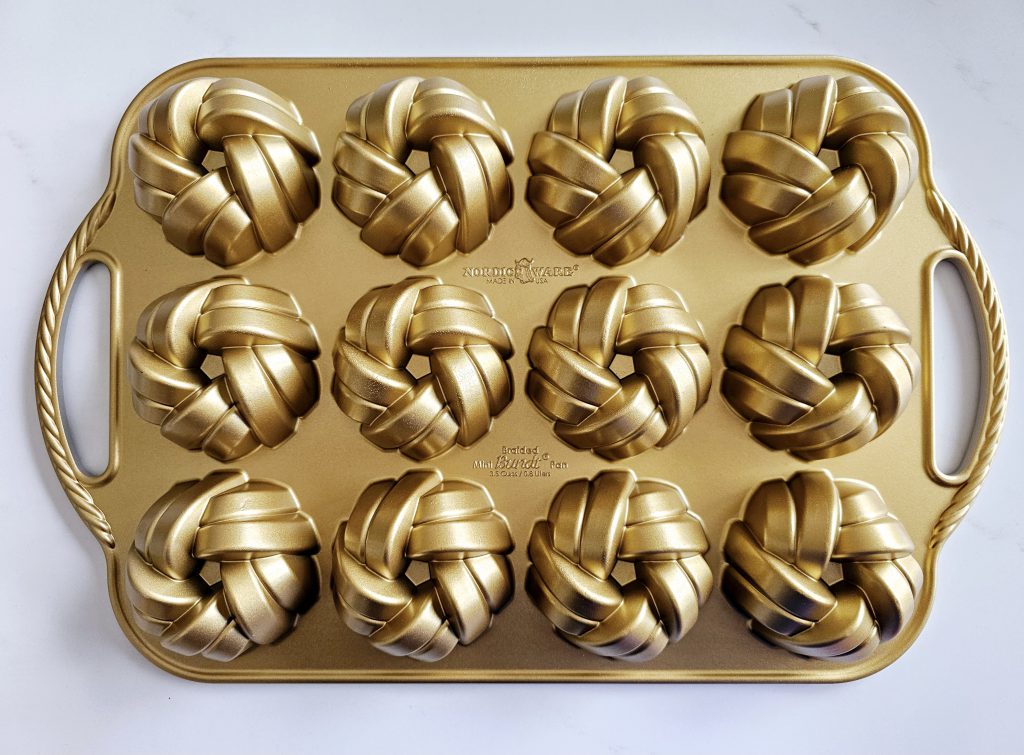
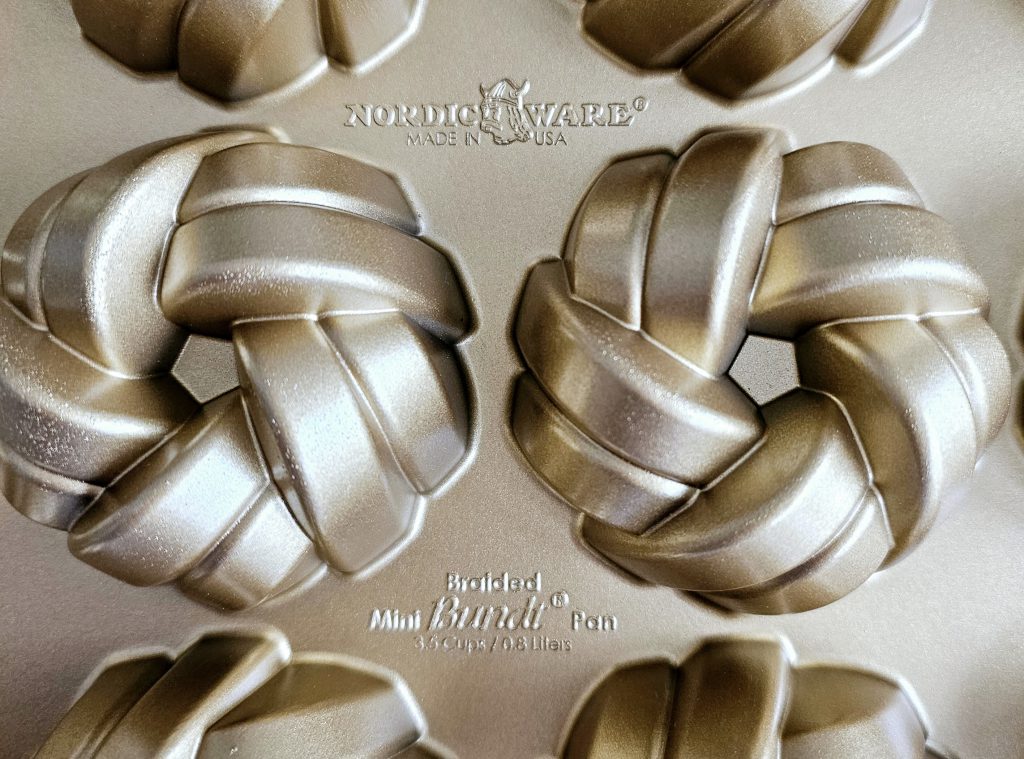
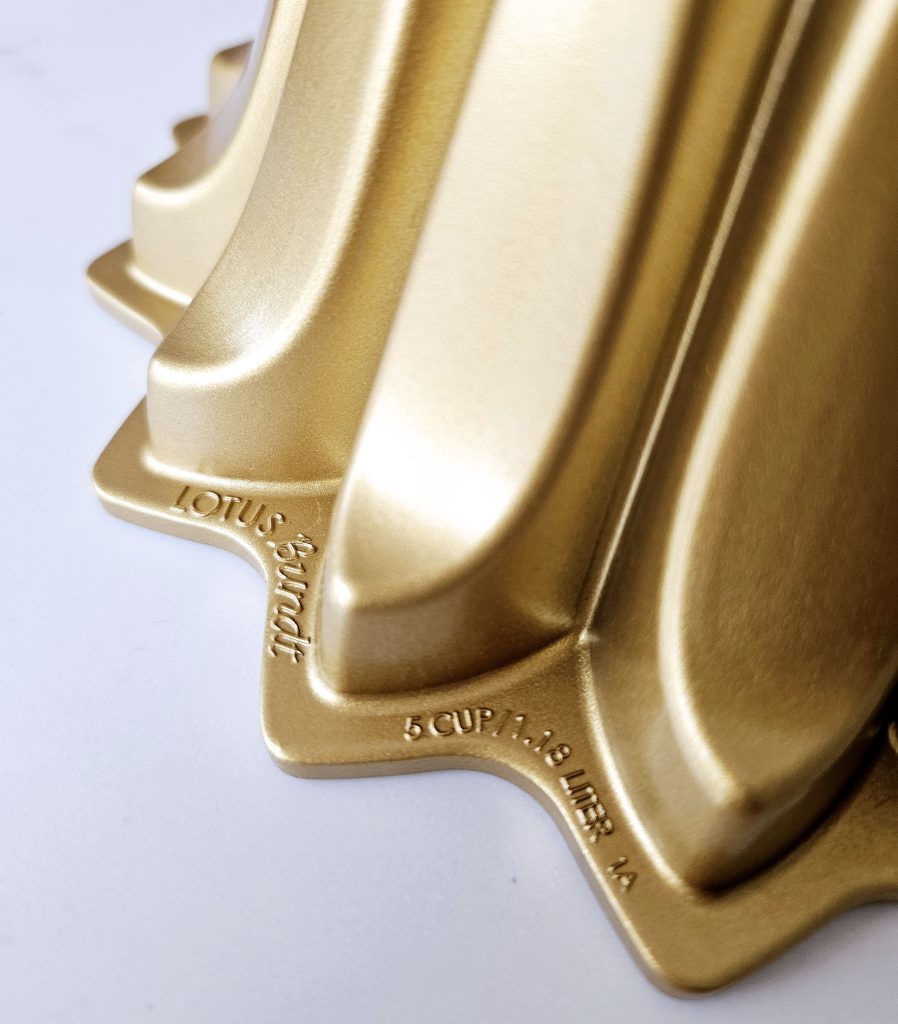
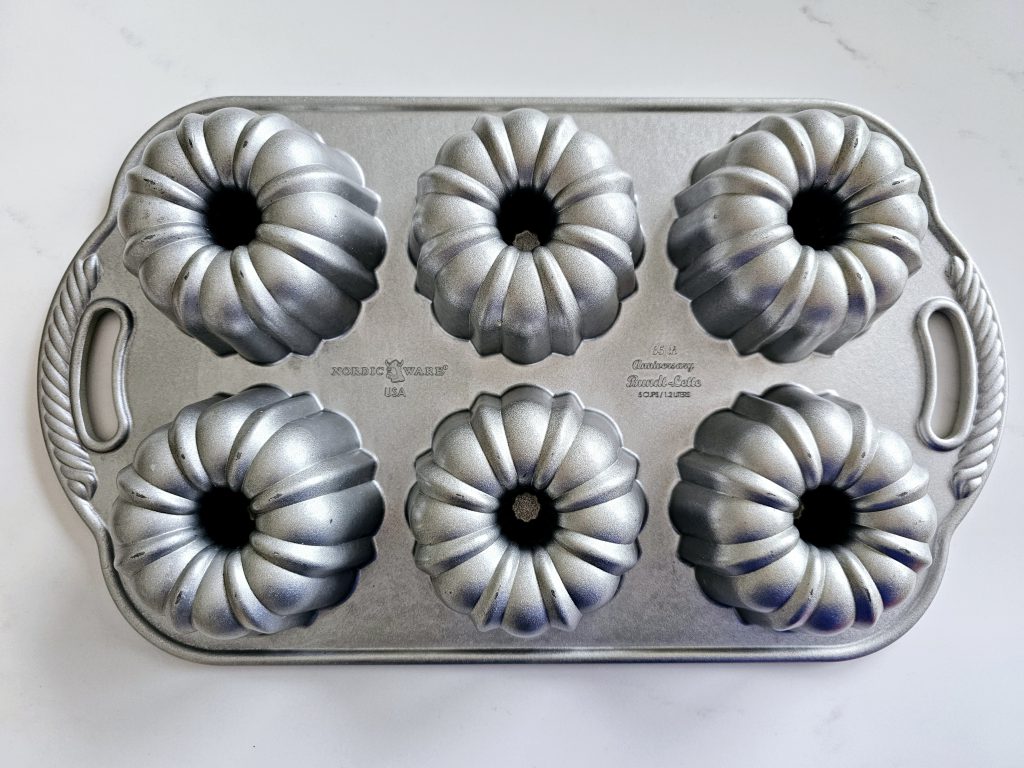
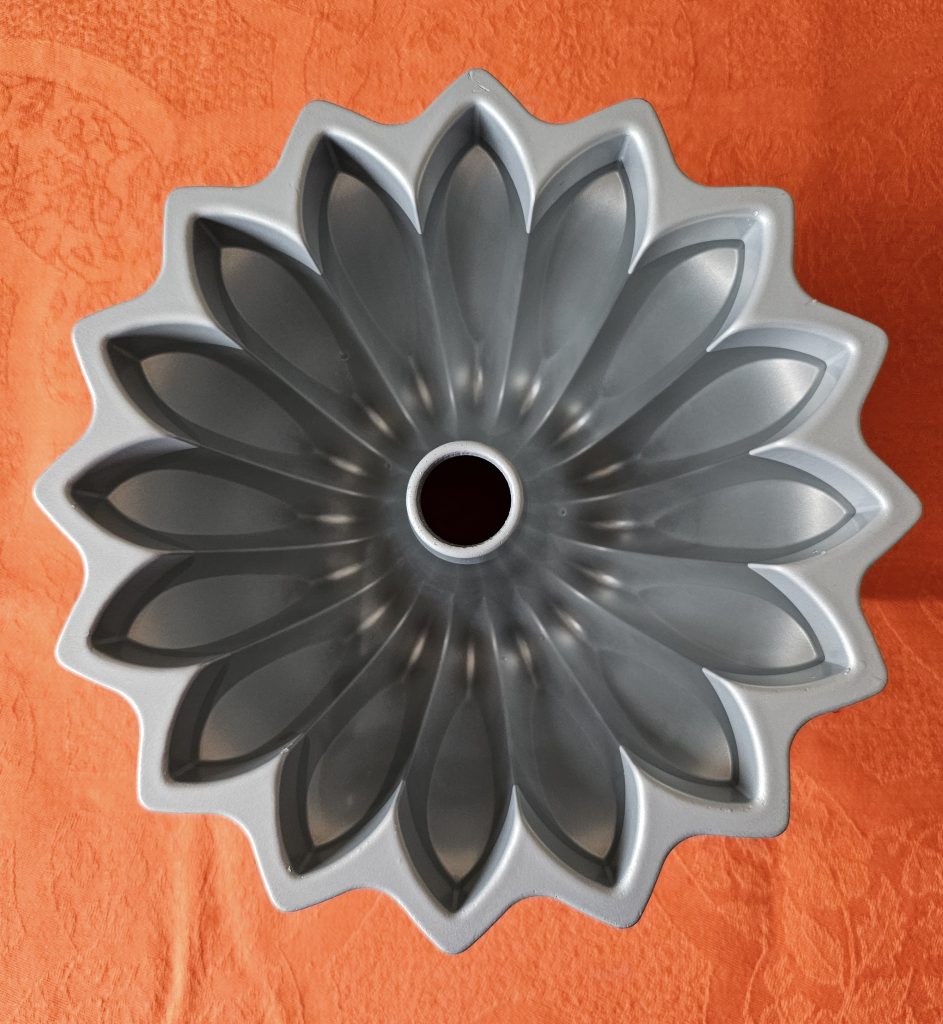
Other bundt pans showing their volume in cups


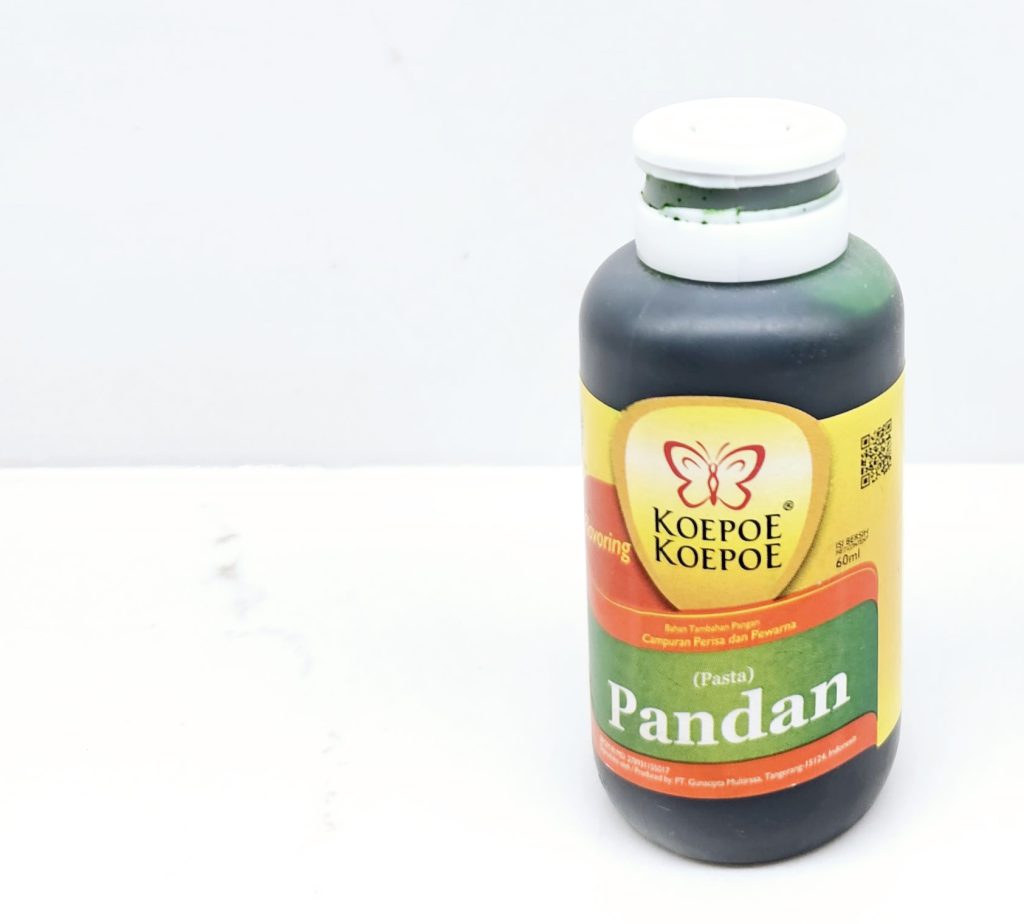
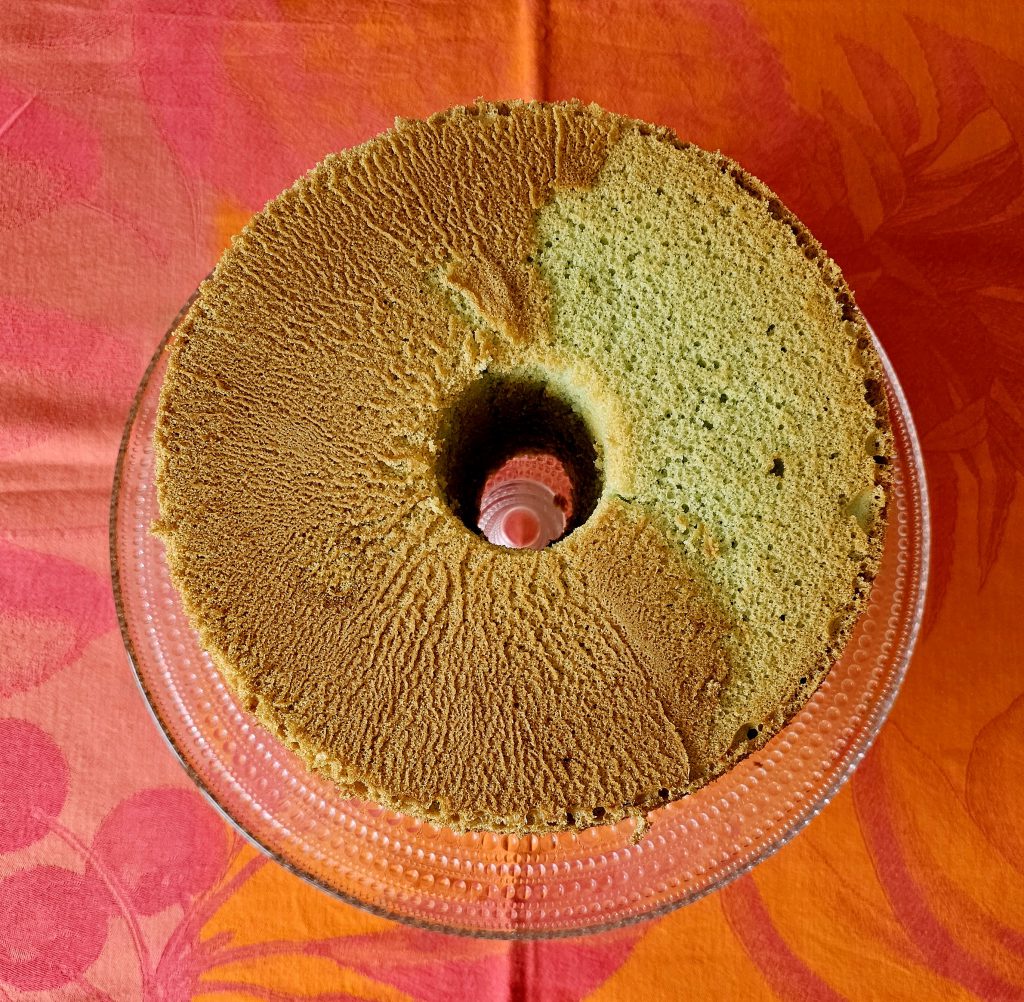
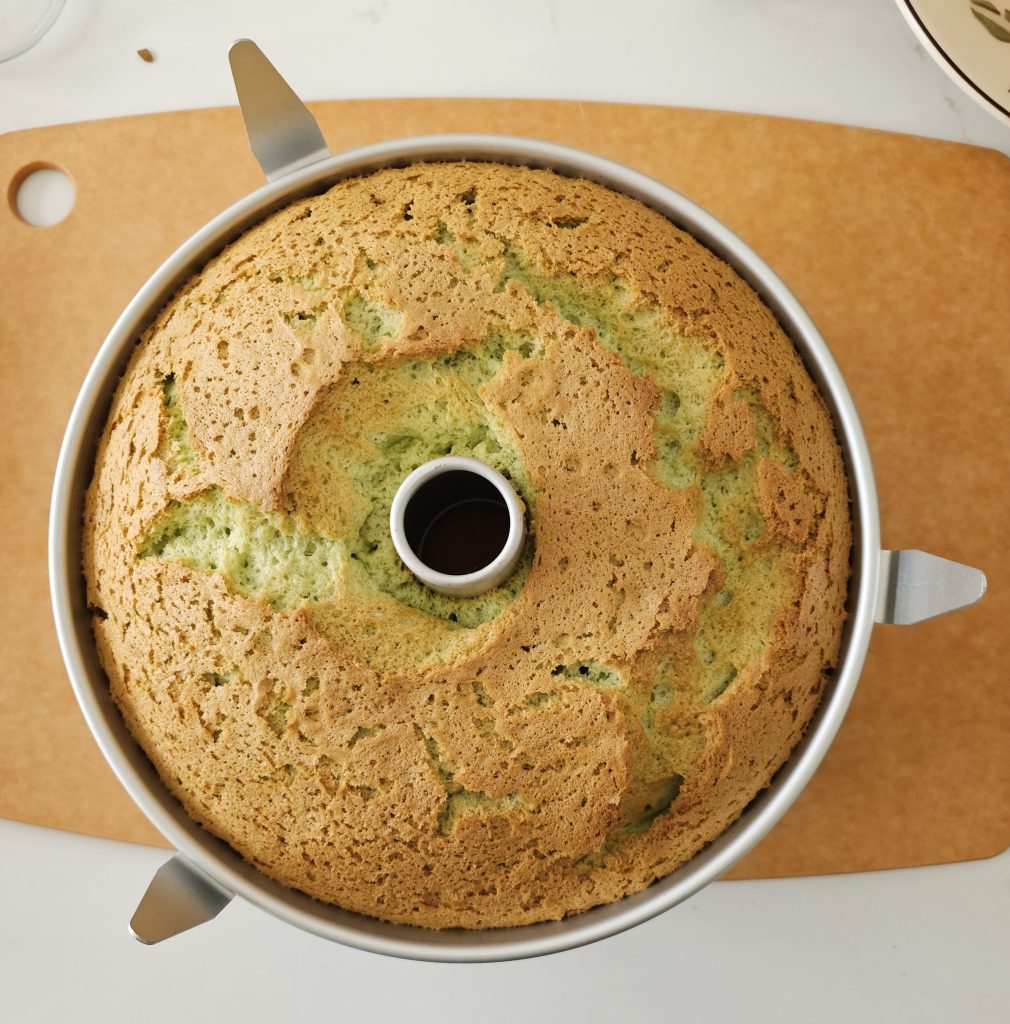
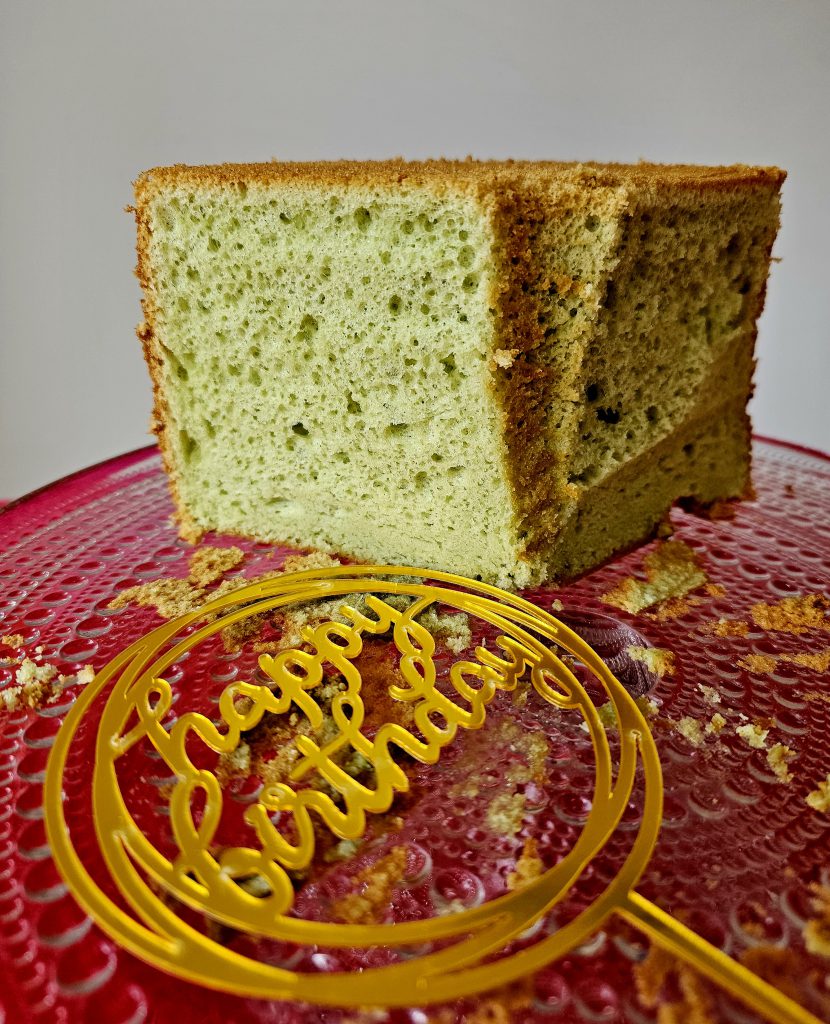
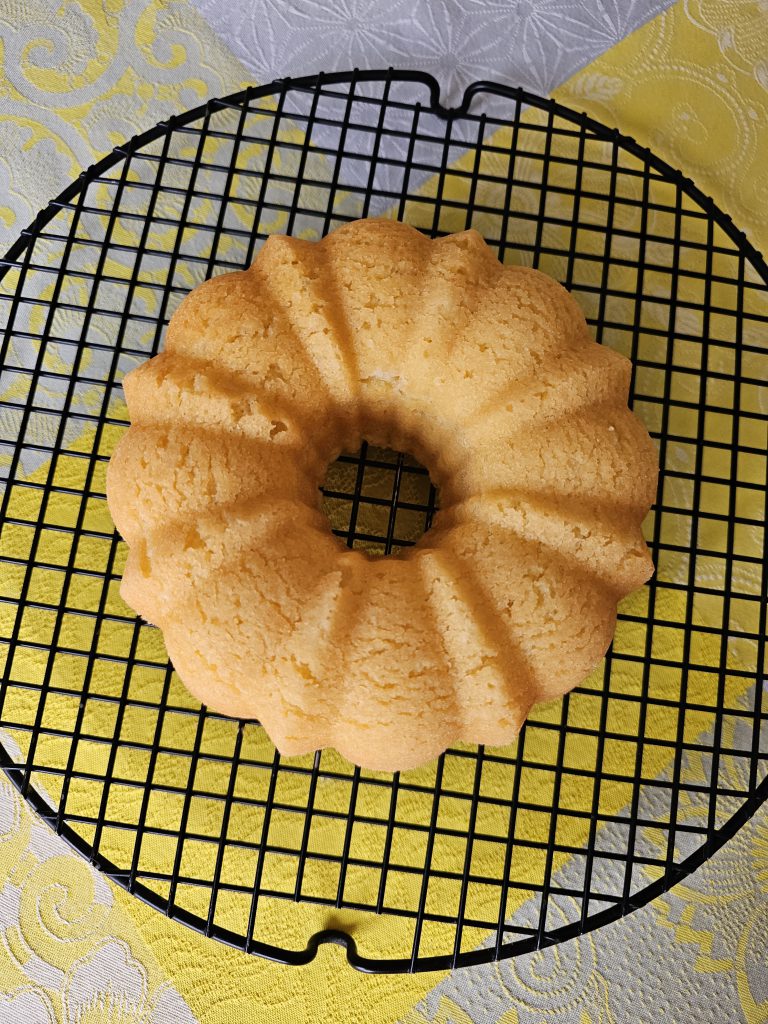
Almost all bundt cake recipes state the oven temperature as 180 C / 160 C fan. After several high-domed cakes I went back to the beginning of my baking ‘career’. What I learnt in home economics classes was that if the centre of a cake peaks or domes it means the oven temperature is too hot. Conversely if it sinks in the middle the oven temperature is too cold. I tried lowering the temperature to 170 C / 155 C fan which gave much better results. The cake rose a bit more slowly and more evenly. Baking at a lower oven temperature is possible using a bundt pan because they are so solid and conduct heat so well. I have finally settled on a 150 C fan temperature (in my Gaggenau oven) which yields the best results.


After baking another half a dozen cakes, I thought to make a standardised chart giving a basic cake recipe, to which you can add flavourings or substitute part or all of one ingredient for another. Since Nordic Ware is an American company, most bundt recipes are measured in cups. I cannot deal with cups as I like precision in baking, so I devised a spreadsheet using a basic pound cake recipe. A pound cake means you use a pound (454 g) each of flour, butter, sugar and eggs. Once you get the hang of the basic recipe, you can play with substitutions.

I have rounded up/ down the metric measurements to make it less awkward, so it is not exactly a pound cake recipe. To incorporate any additions (like vegetables, fruit, nuts, chocolate) you should use the measurements for a smaller sized pan to prevent an overflow of the batter. Sugar is always reduced in my recipes, but you can use up to the same amount as the flour and butter. Eggs vary in size all over the world so I have weighed it without the shell.

Ingredient Flour Butter/ Fat Sugar Eggs (weight without shell) Eggs in shell, approximately
Pan size
5 cup 125 g 125 g 85 g 100 g 2 large
6 cup 150 g 150 g 100 g 120 g 3 medium
9 cup 225 g 225 g 150 g 180 g 4 medium
10 cup 250 g 250 g 170 g 200 g 4 large
12 cup 300 g 300 g 200 g 240 g 5 large


One big, big tip about avoiding the disaster of a cake not turning out from the bundt pan: always make the double effort of buttering and then flouring the pan. I place the butter in the pan to soften a few hours before I start baking, or overnight, then use a stiff pastry brush to let the butter ‘get into the groove’ (remember Madonna’s advice). After that I sift about a tablespoon or two of plain flour onto the butter, moving the pan around to coat it evenly. The excess flour can be removed by turning the pan upside down and giving it a tap, which is best done over a sink.


There is only one bundt pan company you should consider which is Nordic Ware. They have some recipes on their website if you want ideas. I do not maintain a bucket list, but if I did, a visit to the Nordic Ware factory in Minneapolis would feature in it.

I will share some successful bundt recipes in the next few weeks.


Some American Baking Books:

I find using American baking books tricky as almost all the recipes use cups as measurements. However there are so many ideas drawn from the cultural melting pot that makes up the USA that I find new things to bake that I had not thought of before.

Pastry Love: A Baker’s Journal of Favourite Recipes, by Joanne Chang, published by Houghton Mifflin Harcourt, ISBN 978-0544836488

Zingerman’s Bakehouse: Best-Loved Recipes for Baking People Happy, by Amy Emberling and Frank Carollo, published by Chronicle Books, ISBN 978-1452156583

The Good Book of Southern Baking: A Revival of Biscuits, Cakes, and Cornbread, by Kelly Fields with Kate Heddings, published by Lorena Jones Books, ISBN 978-1984856227


Pandan Chiffon Cake

Happy Birthday to everyone with March birthdays


It has been a month since I posted my February birthday cake recipe. Life is continuously busy but I am a firm believer that humans are made to engage with work. Having something to keep me busy daily keeps me challenged and makes me happy.

I do need to write up my Singapore notes! Otherwise they will end up like all the other travel notes including our trips to the Scilly Isles and the New Forest.

The pandan chiffon cake recipe has been a hurdle, although I should not have made a mountain out of a molehill. The problem was not the lack of a reliable recipe, as I would base it on my perfected orange chiffon cake. The problem was always whether to use fresh pandan extract or to use pandan essence. In the end I made stab at it and used both.

We had a family lunch to celebrate Junior 1’s 30th birthday, starting with Pommery champagne and sesame prawns on toast (fondly referred to as SPOT in our house).


I am very fond of Pommery. The reason for this sentiment is that when Mr Gochugaru turned 30 (we are now both approaching 60), I organised a surprise weekend away at the newly opened Hotel du Vin in Winchester, with my in-laws roped in to look after the (then) very small Juniors 1 and 2.

When he saw his packed bag, Mr Gochugaru was more shocked than surprised and almost refused to go. On the way to the hotel he cautioned me never to pull a stunt like this again. I haven’t, and we are still married.


To extract the pandan juice from fresh pandan leaves, you have to blend a quantity of leaves with water, squeeze out the juice, pour into a container, wait for the thicker green extract to settle, discard the top pandan water then use the extract in the cake batter.

I was short of time and instead blended the pandan leaves directly with the coconut milk then squeezing everything through a cheesecloth, using it immediately to make the cake. Whichever way you use to extract some juice from the pandan leaves, you will still need to top up the flavour by using a shop-bought essence.


There are different brands of pandan essence but the one most bakers recommend, if you can get it, is Koepoe Koepoe (Butterfly) brand


This recipe will make one large 25 cm cake, perfect for family parties. You can also divide the mixture and use two smaller chiffon baking tins, adjusting the baking time to reflect the smaller cake sizes.


For the Cake:

(everything is weighed so it is fool-proof)

225 g self-raising flour

225 g unrefined caster sugar

½ teaspoon fine sea salt

125 g sunflower oil

125 g egg yolks (roughly 7 large egg yolks)

75 g fresh pandan leaves

200 g coconut milk (I use Aroy-D brand)

¼ teaspoon pandan essence, Koepoe Koepoe brand


For the Meringue:

300 g egg whites (roughly 8 large egg whites)

1 teaspoon cream of tartar

45 g unrefined caster sugar


Equipment:

You will need a 25 cm Angelfood Cake Pan, sometimes called a Chiffon Cake Tin. The tin has to be left UNGREASED.

The same recipe will fill two smaller chiffon cake tins, each with a width of 17.5 cm and 21 cm. Bake the 21 cm cake for around 50 minutes, and the 17.5 cm cake for around 45 minutes. You can freeze one cake for another day.

I used my KitchenAid but you can also use a handheld electric beater.

You will need two large mixing bowls, one for the flour and egg yolks and another for the egg whites.


How to Make:

Preheat the oven to 325°C/170°C.

Cut the pandan leaves into thin strips and blend with the coconut milk until you get a fine mush. Place this in a muslin cloth and squeeze out the pandan and coconut extract. Set aside.

Sift the flour, sugar and salt into a KitchenAid mixing bowl, or a large mixing bowl.

Make a well in the centre of the flour and add the oil, egg yolks, coconut and pandan extract and pandan essence.

Using a flat beater or a flex-edge beater (KitchenAid) OR a hand-held electric beater, gently mix the ingredients to form a smooth batter. Keep this aside whilst you prepare the egg whites.

Place the egg whites in a separate KitchenAid mixing bowl (or a large mixing bowl) and using the whisk attachment, beat on a high speed until frothy (KitchenAid speed 6 for around 30 seconds).

Add the cream of tartar and continue to beat until soft peaks form.

Sprinkle in the 45 g sugar bit by bit and continue to beat for about 3 – 5 minutes, until stiff peaks form. Keep watch over the meringue like a hawk so it does not overbeat, as the whites will then become dry and separate.

When the meringue is ready, fold it into the flour and egg yolk mixture, using a large balloon whisk or rubber spatula. Do this in stages, folding the meringue in gently until the mixture is well combined and there are no streaks of batter or meringue visible.

Pour the batter into the ungreased cake tin and bake in the oven for 55 minutes or until the cake bounces back when touched. A metal skewer inserted in the centre should come out clean.


After baking: in stages

Remove the tin from the oven and immediately turn it upside down, resting the legs on a heat-proof surface. As it is ungreased, the cake will not fall out. It is this ‘suspension’ that ensures the cake does not sink as cools. The bubbles created by the beaten egg whites ensure its lightness. Set aside the cake to cool in the tin for at least 1 hour


When the cake is completely cooled, turn the tin the right way up. Using a long metal or plastic spatula, loosen the cake from the sides and central tube


Remove the cake from the tin (it will still be attached to the base) and using a long metal or plastic spatula, loosen the cake around the base whilst it is till in an upright position. Turn the cake upside down on a large board or serving plate and it will fall down neatly


I served the cake plain but it would go well with some coconut ice cream or some ‘salted caramel’ sauce made with gula melaka and coconut cream. I don’t have a recipe for either so this is a future project.


There was not much cake left at the end of our lunch…


If you are like me, in your late 50s heading towards your early 60s, you will appreciate how fast time flies. In the past 30 years I have seen many happy as well as many sad events in the lives of those in my friendship and family circle. Looking back I was always so keen on organising everything down to the last detail but since the pandemic, and since my father passed away, I have allowed myself to loosen the grip on a lot of things.

I really think we need to accept that we may not be here tomorrow. I am always so relieved when I wake up in the morning and it is another new day. There are always things to do, but now I want to also say ‘there is always another glass of champagne to drink’.


PS:

Our menu today (which hopefully someone can read in 30 years’ time) was Pommery champagne, sesame prawns on toast, whole organic chicken poached in an aromatic soya sauce, grilled side of salmon, sweet winter slaw from Plenty by Yotam Ottolenghi, Vietnamese summer rolls with a hoisin-peanut sauce, rice with fried garlic and ginger and the said pandan chiffon cake. Thank you to Juniors 2 and 3 for helping with the cooking. Mx


Minced Pork with Chilli and Basil


I was looking forward to writing up some cake recipes but the last cake I made, a pistachio and white chocolate bundt, was not quite perfect. I am waiting for a clear day to make another one. Cakes need precision and timing and careful watching over. They don’t do well when you are rushing about from one thing to another, so it’s best to wait.

In the meantime I made two dishes from a cookery book which aims to demystify Thai cooking and make it achievable in a regular western kitchen. The first dish is called pad krapow moo (stir-fried minced pork in fish sauce with basil) and the second is gaeng keow wan gai (green curry chicken). Both had some ingredients in common but the results looked and tasted very different.


What makes the dish distinctively Thai: nam pla (fish sauce) and fresh bird’s eye chillies


The recipe calls for chilli and garlic to be pounded in a pestle and mortar until you get a rough paste, but I chopped up the chillies and crushed the garlic using a garlic press


For the Pork (adapted from pad krapow moo with nam pla, page 120 of the book):

2 red bird’s eye chillies, finely chopped (I left the seeds in)

20 g garlic cloves, crushed

2 tablespoons sunflower oil

500 g minced pork

2 – 3 tablespoons nam pla (some brands of fish sauce are saltier than others)

1 teaspoon unrefined caster sugar

½ teaspoon dark soya sauce

a very large handful of holy basil, Thai sweet basil or regular Italian basil leaves


How to Make:

Heat the oil in a heavy pan – I used a Le Creuset casserole pot. Add the chilli and garlic and fry until fragrant, then add the pork.

Using a large flat wooden spatula, break up the meat and fry until it is cooked through. Add the fish sauce, sugar and dark soya sauce. Add 100 ml water and simmer for 10 – 15 minutes, until the pork is cooked through and the sauce has reduced a little.

Switch off the heat then add the basil, stirring it through until it has wilted.

We ate the pork with steamed jasmine rice and a large bowl of stir-fried vegetables.


By the time I finished cooking, an already grey day turned even darker. The dish tastes really good, better than it looks here in the photo!


Baan: Recipes and stories from my Thai home, by Kay Plunkett-Hogge, published by Pavilion Books, ISBN 978-1911624059